 The United States is home to nearly 264 million vehicles with 218 million drivers. As a result, it’s one of the busiest countries in terms of road traffic.
The amount of traffic on the roads is one of the leading causes of car accidents. With this in mind, it’s not uncommon to see cars with dents in the bumpers.
If you’ve got a dent, here are some DIY bumper repair tips you should follow:
Understanding Bumper Repair Mechanics
Modern cars come with plastic bumpers. The metal parts are behind this plastic sheet so that any minor bumps and dents pop back out more easily.
Even with this new technology, if you go head first into another car, the plastic will bend or break.
While most crashes that lead to vehicle damage happen at low speed, repairing a bumper can still cost a small fortune.
Luckily, the parts and materials necessary for a bumper repair are easy to come by.
Here is a step by step guide you can follow:
Prepare the Fascia
Before you get started, remove the plastic bumper cover. Screws connecting the plastic to the car could be:
- Under the tail lights
- Behind the wheel wells
- Below the trunk latch
The first step to repairing your bumper is finding out which type of plastic it’s made of. This will help determine what type of adhesive you need. You should find a label with PP, PPO, PUR, TPUR, or TPE on the inside of your bumper.
Next, cut off any large pieces that are breaking the natural contour of your bumper. If there are no large pieces to cut off, sand down small burrs with 80 or 100-grit sandpaper.
Remember to clean the inside of the bumper as well.
Reinforce the Dent
Before you add filler, reinforce areas behind any holes with mesh or auto-repair cloth. Cut the cloth about an inch larger than each side of your holes. Soak it with fiberglass-impregnated body filler.
Then, press the fiberglass mesh over the holes from the inside of the bumper. Your patch should set for at least three hours before adding the filler. If you can, leave it to set overnight.
Add the Filler
The next stage of your DIY bumper repair is to add the filler. Make sure that the patch has set, and add the filler to the front of the bumper.
Add one layer of filler at a time and let each one dry before applying the next. The container should tell you how many layers you need to achieve a near flush finish.
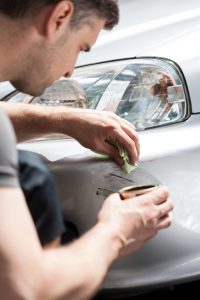
Sand and Paint Your Bumper
Once you’ve applied the filler, let it dry completely and sand the area smooth.
Before you complete your bumper repair, make sure the paint matches your car’s color.
As long as you know the vehicle’s make and model, you should find the right paint in store or online. You can get this information in your car repair manual.
Spray paint is toxic and should be used with caution. When using it, work in a well-ventilated area with the right safety gear.
DIY Auto Repairs Made Easy
DIY auto repairs can save you a lot of money.
If you want to learn more insider tips on how to repair various parts of your car, check out our blog! We provide everything you need to fix your vehicle like a pro.