
Retrofitting air-conditioning systems has been losing its popularity due to the decrease in automotive R-12 systems on the road, but I still see motorists asking questions about the proper way of converting their old systems to r-134a.
I have looked at many converted automobiles with very poor performance after the work is done. Some converted AC systems don’t work well or the cold doesn’t last long, because the procedure wasn’t followed properly. Below is a detailed list that covers the steps that should be followed when converting to newer type Freon.
Checking off each step or asking your mechanic to do so can help keep the car interior cool, but also improve the reliability of the AC. Always ask your shop to make sure current EPA legislative mandates are documented and followed.
This freon conversion is a government regulated change to the automobile. Some of these steps require equipment that most people don’t own, but even if you take your vehicle into the auto repair shop it’s nice to know this stuff.
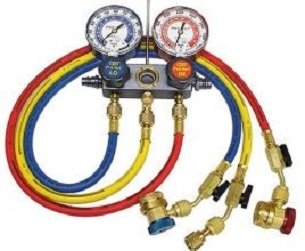
Learning what is required to complete the retrofit properly helps assure the long term reliability of the expensive individual system components. If you do plan to perform these repairs yourself, do yourself a favor and buy an AC conversion kit.
There’s one pictured to the right. Also before you get started please review my auto air conditioning safety tips. Plus check out a few more inexpensive air conditioning tools that I made available below.
How to Retrofit Air Conditioning Systems
- I always start with a good visual inspection of the entire automobile air-conditioning system. I look for any obvious problems like chafed lines or wet oily spots that may indicate a refrigerant leak.
- Then I run a good performance test on systems that are still working. I record the temperature at of the ducts and also the pressure readings on the gauges. This is before I perform any repairs to the AC system. You need to know the output temperature before and after.
- Next I will remove all of the old R12 from the system with an approved recycling machine. In our shop, we have a special machine just for r12 systems.
- This next step is necessary and a lot of people will skip it. Your A/C compressor will require an oil change. R12 and R134-A use different refrigerant oils. It is necessary to remove the air-conditioning compressor and drain out all the oil.
- I always measure the amount of refrigerant oil that comes out and install the same amount using approved r134a pag refrigerant oil.
- If the vehicle is equipped with an expansion valve I remove and clean it. If the system has an orifice tube, I will usually replace it. This is because the orifice has a screen on it that can become partially clogged. Also, this part is usually only a few dollars.
- Then you remove the receiver dryer or what is also called the accumulator. Again you drain the refrigerant oil out of this part and measure the amount that comes out.
- Next you will install that amount of 134a system oil in the new accumulator. Note that replacing the accumulator is highly recommended at this point. Especially if the system had no Freon in it before the conversion process.
- The next step in retrofitting air-conditioning is to permanently install the components that you removed with new O-rings. A good tip is to coat the new O-rings with 134 a refrigerant oil you have been installing in the system. This will increase the lifespan of these O-rings and prevent any small leaks from appearing.
- Now most of the work is behind you and the fun part begins. It’s recommended that you permanently install the conversion fittings, using a thread locker such as Loctite.
- Note that these fittings are supplied in a conversion kit that can be had at any parts store. The kit comes with a conversion label you must apply to the vehicle.
- Next you’ll want to pull a vacuum on the system for at least 30 minutes. This will remove any moisture and impurities that entered the system while it was disassembled.
- This is also a step that is often skipped when people are in a hurry. Doing this truly adds longevity and reliability to the air-conditioning system.
- This next step is important because it is time to recharge the system. The rule of thumb is that the replacement R134A Freon is about 80% of the R-12 charge. If you charge the same amount as originally installed the system will not function properly.
- Next you’ll want to run an AC performance test on your new retrofitted air conditioning system. The temperature may be a degree or two warmer than it was previously and this is a normal condition.
- Also note that your pressures may also be slightly higher on both the high and low sides. The target low side pressure is about 35 psi. But this will vary with the outside temperature.
Converting Car Air Conditioning
The above procedure is my opinion on the proper way for retrofitting air-conditioning systems. I have seen do it yourself car mechanics as well as professional ones skip several steps that are listed above.
The AC system might operate just fine when finished. The question is how long will it last before a problem develops. Performing all of the outlined steps above will often result in a more reliable automobile air conditioner system for years to come.
If your auto mechanic is performing these repairs, print out this page and ask him to follow all of the steps outlined. Or quiz him on the retrofitting air-conditioning procedure and ask for the old parts.
Automotive air conditioning tools
If you need one on one help with your car ac problems this kind of help is available. Learn more about how mechanics can provide car repair help directly to you. I have a lot more information about your vehicles, AC system. Learning exactly how the system functions will help in diagnosis and repair and assure you will have a cool summer season. This next link takes you from Retrofitting air-conditioning to automotive a/c systems. The homepage is a good place to see what else is covered on this automobile website. Also learn more about the car mechanic that built it and why he thinks most people can do there own minor Diy auto repairs.